Tampilkan postingan dengan label activities for kids. Tampilkan semua postingan

5 summer activity ideas

Diposting oleh fawaid on Selasa, 07 Juni 2011


I was asked to a summer fun segment on Good Things Utah yesterday and my kids got to come along and demonstrate! :) It was really fun and luckily it all went smoothly but it is "hard" to run a segment and also worry about what 3 other little people are doing or going to say! ha ha ha!

I shared a few ideas and also 1 from Activity Mom and HowDoesShe. Enjoy!
Read More

Pass the drawing!

Diposting oleh fawaid on Jumat, 03 Juni 2011

Another fun summer idea that I found on the lissybug blog! 

It's a quick idea that can be done anytime and anywhere! It would be fun in the car too! 
Pass the drawing - go to the lissybug blog for all the details!

My kids LOVE this! We have done it several times and have done several rounds each time too! Even my 2 year old can participate! Great fun for the whole family! Have a great weekend!
Read More

DIY stilts- Someday Crafts

Diposting oleh fawaid on Senin, 30 Mei 2011


Hi! I'm Michelle from Someday Crafts. As a working mom of 2 young children, I highlight great ideas I see around blogland that I want to do when I get the time.....SOMEDAY! I hope you come over and see my blog! You will find some projects that you want to do someday also.
Today, I am showing how to make some
EASY, INEXPENSIVE and QUICK food can stilts!


After I get home from work, the kids and I play for hours. They are so much fun! These stilts (or rompers, as they were called when I was younger) are one of their favorite activities. It builds great coordination and forces the kids to work on their balance.

Materials:
-Two emptied cans of food (28oz or larger)
-Two pieces of rope or heavy duty string, each at least 1 yard long
-A sharp object that can puncture metal, i.e. screwdriver, knife
-Spray paint (optional)

1. Empty two large cans of foods. These are 29oz. fruits. If you use smaller cans, they will be less sturdy. Wash the cans out!

2. Peel the labels from the cans and gather your spray paint. I got this Krylon outdoor spray paint at the dollar store! SCORE!!! (Those are my cute kiddos!!!)


3. If you are brave, let your kids spray paint the outside of the cans. Let the paint dry. (My kids like to help with everything I do. That's why I don't get much done!!!)


4. Using a sharp object, punch two holes through the can on opposites sides. I used some type of knife. The holes need to be near the top of the can where a lid still exists. I do NOT recommend letting your kids do this part!


5. The holes need to be large enough to fit your handle through. When I inserted the knife, I wiggles it back a forth a bit to make the hole wide enough.

6. Cut your handle material. I used something called mule rope (or at least that is what my husband told me it is called.) It is like a strong flat rope. I suggest a rope or heavy duty string. I would also suggest at least a yard or more of material. It depends on the height of the person for whom you are making it. The handle should come about half way between the knee and hips or whatever is comfortable. Insert your handle material through the holes from the outside to the inside.


7. When the handle material is inside the can, tie the ends in double knots. You can burn the ends of the rope if you want. You are finished!

Here is one pair of spray painted and one unspray painted cans. If you don't paint your cans, there is a chance the cans can rust. I have tied knots in the handles of one pair to make them easier for my younger/shorter son to use. That is an easy way to adapt the handles for smaller kids.


Walk. Walk. Walk. I did want to mention that the food cans can/will bend if they are stepped on sideways. I just bend them back into place the best I can and let the kids continue clanking around.

These were a hit at my kids' birthday party last year! (Kids under the age of 3 may have a hard time balancing on these. Use your judgement as to when kids are old enough to play with these.) The neighbors love to play with these toys.


Thanks for letting me share one of my kids' favorite activities. I hope to see you over at Someday Crafts.
Read More

Put me in the Zoo - Fireflies and Jellybeans

Diposting oleh fawaid on Kamis, 26 Mei 2011

Hello Brassy Apple! I cannot even begin to tell you how excited I am to be here today with all of you lovelies! I adore Megan and all her crafty-ness! To say that is it a complete honor is not even touching the surface!

Let me introduce myself!


I am Fawnda and you can find me at Fireflies and Jellybeans!  I am a thirty-something mom of two{ 3 year old son and 1 year old daughter}!  My Husband is my best friend and biggest supporter {I am every lucky}!

We have all sorts of fun over at Fireflies and Jellybeans! I share crafty tutorials with you, we have the Iron Crafter Competition and a fun Show Off Your Stuff linky party on Thursdays.

I am also so excited to be part of the Save Our Summer series! I need as much help as I can get with my two Little ones... I am also happy to share one idea with all of you too!

Put Me in the Zoo Activity day!

Lets face it... most days I feel like I live at a zoo with all the wild craziness that is my life! I decided to embrace it and make a whole day of fun activities for us all! 

And as any good theme day we need t-shirts!


Here is a quick run down of  how I made the shirts... I used my Silhouette SD (who I loving call, Skyla) to help make these... however you do not need one to make your own. 


Sealed with a Kiss Shirt:

1. Cut out a seal applique, and sew it on

2. Add your "Sealed with a Kiss" lettering (I used Iron on vinyl from Silhouette but you could freezer paper stencil the words on too! )

3. Add your "XOXO" rhinestones (also from Silhouette)


1. Cut out felt shapes-

1 circle for face

several bigger strips (about 3/4 inch wide)

several smaller strips (about 1/8 inch wide) some long some short.

2. Pin your wider strips to your circle and sew in place.

3. Pin your smaller strips in place (random with the short and long) and sew.

4. Hand sew the face.  I used 2 buttons for eyes and a triangle piece of fleece for the nose.

5. Pin in place on your t-shirt.  I sewed around the face and then also out side the circle a couple inches to keep the mane attached to the shirt.

6. Add your lettering (I used iron one vinyl from Silhouette but you could a freezer paper stencil)

Put Me in the Zoo Activities:

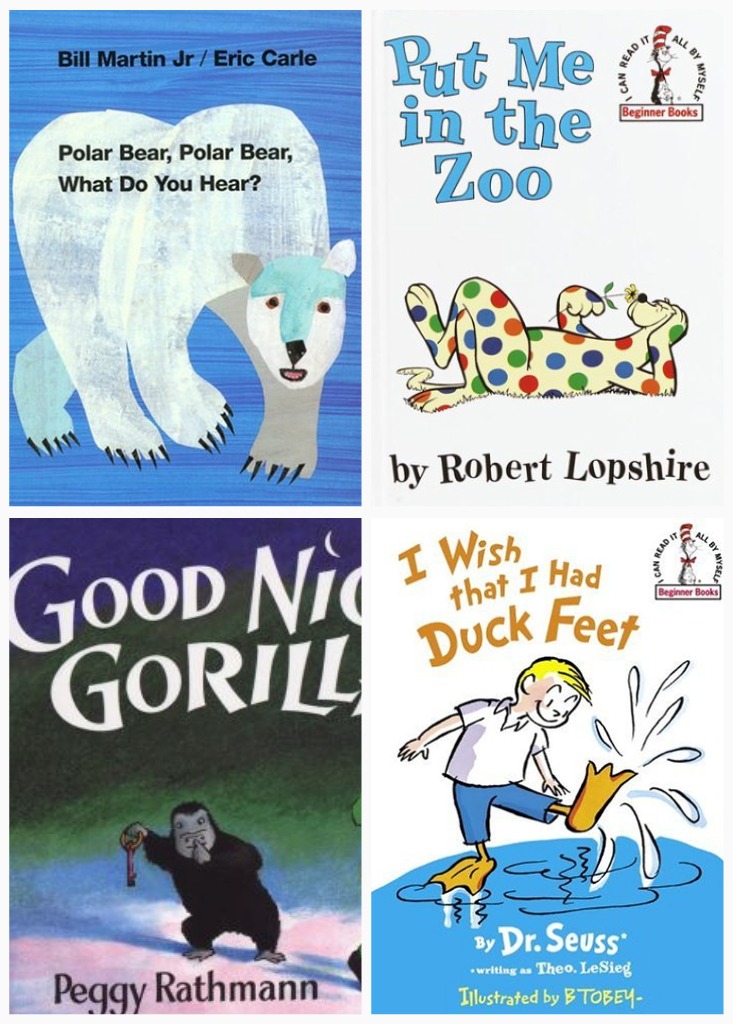
Here are some fun books to read that we love and have to do with zoos and animals!


Polar Bear, Polar Bear What do you Hear?

Put me in the zoo

Goodnight Gorilla

I wish that I had Duck Feet

Animal Follow the Leader:

The leader picks and animal to mimic and everyone follows along.

Take several turns being the leader.

What do you hear?

This is a great activity to go along with Polar Bear, Polar Bear, What do you hear?

You start out saying "Mommy, Mommy what do you hear?  I hear a {pick your animal here) in my ear"  then all make the animal noses... then move on to your kids "Johnny, Johnny- what do you hear?"  then have them pick an animal and say the rest of the rhyme.  You can do several rounds until you make LOTS and LOTS of animal noses!

Make your Own Zoo:

We had a rainy day so instead of going to a zoo, we made our own!

I was quite surprised at how many stuffed animals we had... we had a FULL Zoo!

I had the kids help me set it all up.  It was a great sorting activity!  Once I had some groups established,  I would pull out an animal and ask "Where do you think this should go?"  The kids LOVED making the zoo... almost more then playing with it!  If you have older kids have them make signs for the zoo. 

Here is a tour of our zoo:


Tigers Exhibit

Elephant Habitat  Our Elephant has a baby!

Giraffe and Zebra exhibit

Wolf/Dog Exhibit - we had some rare species of wolf- pink, purple and green... not what you see an just any zoo!


Penguins (with a baby!)

Petting Farm zoo

Aquatic animals

Monkey playground


Our zoo also has a very special exhibit! 

The Monsters exhibit! 


Of course here are the WILDEST animals of ALL! 


I made them pay $$ to enter the zoo... and they had to wait in line for the zoo to open.  We had a friend over what I watch once a week... she added the phone as a prop.  My son HAD to have a wallet to keep his money in!  My youngest is trying to sneak in early!


I also had them bring a camera to take pictures of the animals!

In the second picture my son is looking at the picture he just took and saying "Ohhhhhh, Cuuuuuute!"

Snack/lunch:


Here is our zoo themed lunch.  I used turkey lunch meat for the face, cheese stick for the mane, blueberries for the eys and a strawberry for the nose.  Easy and very kid friendly!


We love Put Me in the Zoo Day!!

Thanks for letting me share today!  We had so much FUN! 

Stop by for more fun ideas!!


Read More

Summertime Badges - The Crafting Chicks

Diposting oleh fawaid on Kamis, 19 Mei 2011


Hey Brassy Apple readers! My name is Nikkala and I'm one of the Crafting Chicks. I'm excited to be part of Megan's Save our Summer series. Summer is such a fun time of year, but it seems to go by way too fast and I want to make sure we make the most of it. My oldest starts kindergarten this year, so along with having a great time this summer I want to make sure he is set for school! My mom always said "summer vacation doesn't mean it is a vacation from life". One summer when I was in 4th or 5th grade, and long before Google was around, she hauled 6 kids to the library every week and had us write research papers on different Native American tribes from our area. Using old school card catalogs, we would look up the topic she had assigned for the week to research about our tribe. Luckily, we were young enough it seemed like fun and not torture! And as a huge bonus, I've never met a research paper I was afraid to write because of that summer.


This summer I'm taking full advantage of my boys eagerness to learn. We're implementing a merit badge type system. You know, like the boy scouts have? I've made up a stack of badges of summer activities and tasks that my boys are old enough do. As they earn a badge it will be added to their collection. I've even made some blank ones as I'm sure a lot of opportunities for badges I haven't thought of will come along. At the end of summer they'll be able to look back at all they accomplished summer 2011!


I don't know if your kids are like mine, but they want so badly to be able to do tasks I'm not ready to let them do. Like my 2 year old is obsessed with being able to crack an egg. We always tell him he hasn't passed the "egg class" or the "knife class" either, for that matter. This is the chance for me to hold these special "classes" and for them to become certified experts. I've tried to make the badges varied in the amount of time it will take to earn. Some will take all summer, others will be one time activities, and some are just fun things we have planned. Like their first airplane ride to visit a new cousin.

My list is geared toward the pre-school to kindergartner range, but of course this is can be customized for each child's interests and abilities. My 5 year old can earn his bike badge by learning to ride without training wheels, while an older child could earn their bike badge by riding a designated number of miles, or even by learning to patch a flat tire.

Here's a list of badge ideas:
Riding a bike
Tying own shoes
Weeding the garden
Washing the car
Reading
Washing dishes
Cracking an egg
Name writing
Camping
Birdwatching
Making a bug collection
Rock skipping
Roasting the perfect marshmallow
Building a sand castle
Stargazing
Pumping themselves on a swing
When a boring summer afternoon presents itself, we will know right where to look for an activity! Knowing my boys, they will try to earn all the badges in the first couple of days! Feel free to stop by and visit more great summer ideas from 2010 over on The Crafting Chicks too!
Thanks Megan for having me!
Read More

Seed Tape - Mad in Crafts

Diposting oleh fawaid on Selasa, 17 Mei 2011

Photobucket

I’m Jessica Hill, the slightly-unbalanced blogger from Mad in Crafts. I used to spend my days teaching Shakespeare and Longfellow to high school students; now I spend my days saying things like, “Try to make some potty come out.”

I am a stay-at-home wife, mommy of two little munchkins, and caretaker of one stinky basset hound. I am also addicted to television, ichthyophobic (look it up, kids), and almost 30. On Mad in Crafts, I exercise my creativity by writing craft tutorials and exorcise my inner schoolmarm through my Mad Writing Skills series.

I am so excited to be able to share this project with all you wonderful readers here at Brassy Apple!

Photobucket


This year I am looking forward to doing a little planting with my 3 year old son, but the weather has NOT been cooperating! Since we haven’t been able to get outside to do any gardening, we needed a good indoor gardening project.

Making homemade seed tape is a good way to get a head start on your backyard garden and to involve your little ones in the process.

Seed tapes are useful because they:

ensure that your seeds are planted at the correct intervals, reducing the need to thin your mature plants.

eliminate wasting seeds.

make sowing tiny seeds much easier.

allow you to sow seeds from the comfort of your kitchen chair, instead of on your hands and knees!

With a few household materials, you can make your own inexpensive seed tape with your children.

Photobucket

To make birthday streamer seed tape, you will need:

a small saucepan,

cornstarch,

water,

white birthday streamers,

a measuring tape,

a washable marker,

and seeds.

First, the responsible (hardy har) adult will need to cook up the “glue” for the seed tape.

Seed Tape Glue

1 cup water

1 tablespoon cornstarch


Cook over medium heat, stirring constantly to prevent lumps. Once it starts to boil and make a gel, remove it from the heat. Cool to room temperature.

Photobucket

While the glue is cooling, unravel the streamers to the width of your garden plot. Lay the streamer next to an extended measuring tape. Using a marker or felt pen, make small dots on the streamer at the intervals recommended for your seeds. We spaced our cucumber seeds out at 3 inch intervals.

Photobucket

If you have preschool age children, practice counting or number identification using the measuring tape or the seeds. If your children are older, you can use the measuring tape like a number line to practice addition and subtraction.

Photobucket

Dab a small amount of cooled glue on each dot and place one seed on each dot of glue.

Photobucket


Continue until each of your dots has a seed.

Photobucket

Fold the streamer in half and press to enclose the seeds.

Photobucket

After the glue dries, the tape can be rolled up and stored for whenever the weather gets nice enough to get outside and plant!

Photobucket

Seed tapes also make thoughtful Mothers and Fathers Day gifts! Make seed tape “rosettes” and use them in place of a bow the top of a present!

Photobucket


I hope you give making seed tape with your kids this Spring a try!
Read More

Summer Activity Board - Sew Dang Cute

Diposting oleh fawaid on Sabtu, 14 Mei 2011

Hello Brassy Apple readers! My name is Tam and I run the blog Sew Dang Cute Crafts, where you can find anything from sewing tutorials to DIY home tutorials. It’s also home to “Crafting with the Stars”. The next Season begins September 1st, so start getting your audition project ready now!!
buttonCrafting-with-the-stars-button
I’m so excited to be part of Megan’s S.O.S Summer series and am thrilled to share with you my contribution – a 30-day Summer Activity Board: 30 activities with your family to fill those summer days with some fun!
30-day-summer-board
The activities are pretty basic and versatile, so you can change things up to fit your family. There also aren’t any set dates, so just fit in 30 days of fun as your schedule allows!!!
These are activities we probably always say we’ll do, but then life slips by so quickly and we realize we didn’t get to some of them. Things like, have a watermelon eating contest, play a game of charades, sleep in a tent in your backyard, make a 4th of July dessert, and so on.Close-up-activities
Hopefully, with this hanging up in our home as a reminder, we’ll get to all of them and make this summer a blast!
I started out with a dull, beat-up $2 frame from the thrift store.
Original-frame
Remove the glass, give the frame a good scrubdown, then paint it the color of your choice. I went with Krylon’s Blue Ocean Breeze.
Paint-frame-blue
I threw the picture out and used the glass for the next part. I wanted mine to be a magnetic board so I could easily move things around, plus my kids really like magnets. After cleaning the glass, I painted it with Rustoleum’s Magnetic Primer that I had leftover from my Magna Chalkdoodle project.
Magnetic-Primer
Once that was dry, I spraypainted it white.
Paint-white
Next I cut 1/4” strips of vinyl and divided my board into 30 squares, and left room at the top for a title. You could easily use paper and simply decoupage them if you don’t have vinyl.
vinyl
To create my magnets, I got my shapes from Microsoft Clipart, designed everything in PhotoShop, and printed them off on Magnet Sheets.
You may want to design your own activities, but you are more than welcome to download my sheets here and here or simply click on each of the images below. I tried to get them to fit on one sheet, but it simply didn’t happen. Sorry.
Summer Fun Activities copySummer Fun Activities 2 copy
After that, I cut them up and stuck them on the board. Simple enough, right?
30-day-summer-board
30 Days of Summer Fun, here we come!!!
Thanks so much for having me here today! I hope you will all come visit me over at my neck of blogland, Sew Dang Cute Crafts. Enjoy your summer!!!


Read More