Tampilkan postingan dengan label mod podge. Tampilkan semua postingan

Anthro Floral shoes - DIY

Diposting oleh fawaid on Jumat, 20 April 2012

Have you seen the colorful collection of shoes from Anthropologie this Spring? My first thought when I saw them was "hey, I've already created those last year!" :) ha ha ha

You can easily replicate this look with some fabric and Mod podge! 
Check out my tutorial here

Wedges are super easy to add a pop of color and/or pattern to with that nice slice of the shoe. AND you can update a pair you already have in your closet or get a pair 2nd hand and make them over! 

And think of how CUTE these could be for little girls too!!! 

Here's a BEFORE and AFTER shot of the shoes I did last year! 

Happy shoe making! And if you give it a try - let me know! Shoot me an email, post on the Brassy Apple FB wall, send a smoke signal.....whatever! :)
Read More

Mod Podged 2nd hand find

Diposting oleh fawaid on Jumat, 02 Maret 2012

It's not just clothes that scream at me to be refashioned but furniture and odds and ends do to! 

A little Mod podge, decorative paper napkins and a second hand store find and I created this: 


Supplies: 
Statue, vase, decorative piece to makeover
Decorative paper napkins
Mod podge
Brush
scissors

Step 1: I loved the shape of the piece I found but it looked off. Then I noticed it was broken on the top.


So before I bought it I searched for a piece to add to the top of it to balance it out. I found a wooden egg shape and it was perfect! A little glue (and dry time) and my I had a new shape to makeover!


Step 2: Unfold a napkin and apply a layer of Mod Podge to a medium sized area. Lay the napkin on top of the Mod Podge and start to smooth out and mold it to the under lying shape. 


Continue the process until the entire thing is covered. 


Step 3: Apply a layer of Mod Podge over the top to adhere the napkin well and to seal it. Smooth out with your fingers. I loved the folds, wrinkles and texture the napkin made. I did NOT try to make it perfectly smooth - you won't get it to do that with a napkin. 


Also - if your napkin tears just cut or rip a piece of napkin and apply over the top. The design on mine made it easy to add layers and over lap without it being obvious. 


Let it dry, place it and enjoy it! This entire project cost me UNDER $5.00! So next time you are thrifting or yard saleing, try to see the shape of the object and how it could be transformed!


I'll be linking up HERE
Read More

DIY fashion accessories - from watch to bracelet

Diposting oleh fawaid on Rabu, 01 Februari 2012


February 1st kicks off a month long series of DIY accessory tutorials! I am so excited to have several guests sharing their DIY ideas with you here on my blog! Each day you will get a new tutorial from a new guest! 


I hope you enjoy all the ideas that will be shared, pin a few (or a lot) and of course - create something new to accessorize with! 

I am sharing an idea today. A DIY bracelet that was once a watch! I thrifted this bracelet/watch and also the metal medallion piece (.50 cents total!)

 The watch didn't work and I never watch anyway but I liked the beaded strap. The metal medallion fit perfectly over the watch face and I knew I had chunky bracelet in the works! 

I picked some fabric and traced around the medallion with a fabric marker. Then I cut it out.

I applied the fabric to the medallion with some Mod Podge and let it dry. 


Then to add a shiny coat I applied a layer of Diamond Glaze and let it dry. It gives it a "professional" look.

Using some good, strong, craft glue I apply the medallion to the watch face and again - let it dry! 
And it's done! Really easy and inexpensive too but original! I'll be linking up HERE to share my idea!


See you back here tomorrow for DIY accessory tutorial from a guest blogger!
Read More

New Family Art wall

Diposting oleh fawaid on Jumat, 24 Juni 2011

Here's a quick project that recently was completed (yeah!). 
I've been wanting to add a place in the family room to showcase my kids artwork that would still look nice when there was not any artwork to be displayed. 
This was my solution. 

I took 4 metal Wizard of OZ signs I had picked up on clearance for under $1.00 (had this project in mind. It just took me about 9 months to actually get around to doing it! ha!) and a metal board I thrifted for $4.00. And yes I bought the metal board just as you see it. Painters tape and all!

A little fabric and some Mod Podge to cover the Wizard of OZ design and make it match my family room.....


Then I painted the frame of the metal board and hung it all together! 


It's a colorful display even without any artwork! Now I get to create some more magnets so we can hang up some family works of ART! :)

Are you going to be crafting up anything this weekend?
Read More

Decoupage your shoes!

Diposting oleh fawaid on Rabu, 01 Juni 2011

(photo from the set of  Studio 5)


Transform a pair of worn out shoes into a STATEMENT pair of shoes you will love to wear! 

I shared this project very quickly on my TV segment for Studio 5 but didn't get to my favorite pair - the chevron wedges - because we ran out of time. Here is a bit of a step by step so you can create a fun pair too! 

Decoupaged Shoes
supplies:
A pair of sandals, high heels, wedges, etc


Fabric
Scissors
Sponge brush

Step 1:  Drape your fabric over your shoes and cut away the excess. If you are working with a pair similar to these cut down the center so you can wrap the inside and outside. 
 Step 2: Apply some Mod Podge to the top of the shoe to place your fabric down. This will help to hold it into place to start.

 Step 3: Continue to glue, cut and wrap the fabric applying the Mod Podge to the shoe and on top of the fabric. 


 Let them dry completely and they are ready to wear! 

CHEVRON Wedges:

Same idea as above but I started with a striped fabric that I cut into 1" wide strips. I started on the widest or thickest part of the wedge. Apply some Mod Podge and smooth out a few strips. 
 Apply Mod Podge over the top to keep the fabric in place and from fraying. Then trim the fabric from the top and the bottom .


 Repeat down the entire length of the shoe and around until it is completely covered! 

 I found it was helpful on this particular pair to apply some Mod Podge on top of the fabric and run my fingernail along the edge where it needed to be cut. This made a line in the glue that I could cut along to match the edge perfectly!


Let dry and wear!!! You shoes are sure to get noticed! 

 
I will be hopping around to the linky parties HERE this week!
Read More

A "shady" tutorial.....

Diposting oleh fawaid on Rabu, 23 Maret 2011

I am "shady" kind of a girl....in a good way. I love lampshades! I love how they can add color and pattern instantly and are so easily changed out. It's not painting an entire room to get a different feel. Changing a lampshade is 1 of those "no commitment" things. 


No surprise, I change some of my lampshades 3-4 times a year - with the seasons and holidays. I have bought them brand new, on clearance and also second hand. If you have a shade you don't love or have one that needs updating, try decoupaging it!

Materials:
Lamp shade
colored or patterned paper napkins
Mod Podge
brush
scissors

Step 1: Tear the hard edges off the napkin pieces. I like the finished shade to have a more fluid feel than hard, straight, rectangular lines that don't match up.


Step 2: Brush some mod podge on the lamp shade and place 1 of your napkins pieces on top. Brush more Mod Podge over the top. Continue layering and overlapping until the entire shade is covered. 


Use your scissors to trim the edge that wraps around the top and bottom lip of the lampshade


Let dry. Place it on your lamp base and enjoy!

 I will be sharing this idea at the crafty link up parties this week!
Read More

Decoupage - crafting with kids - organization...

Diposting oleh fawaid on Kamis, 30 Juli 2009

Thursdays are crafting/cooking days with the kids around here during the summer. This time we did an old time favorite - decoupage! Very simple project, nothing fancy but the kids really enjoyed themselves!

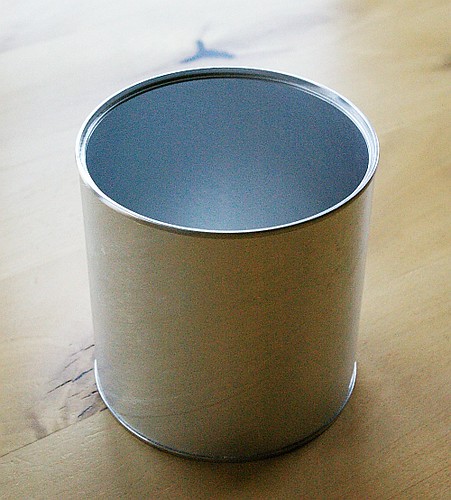
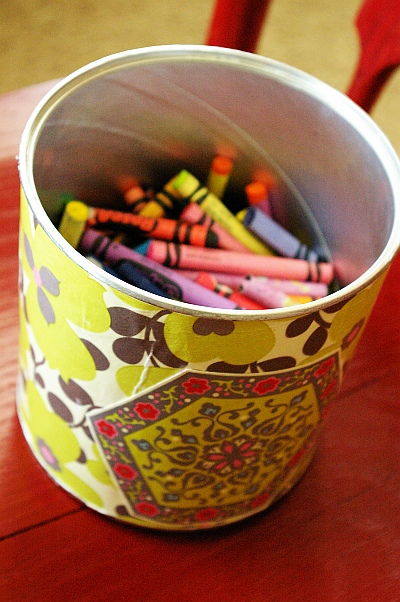
Step1 - I took an empty baby formula can, ripped off the label and cleaned it out. It is our blank canvas just screaming to be transformed! LOL


Step 2. Measure the width of your paper and cut if you want to cover the entire can that way. Or simply cut out pictures from magazines, cut squares of scrapbook paper, tissue paper, etc. The Sky is the limit here!


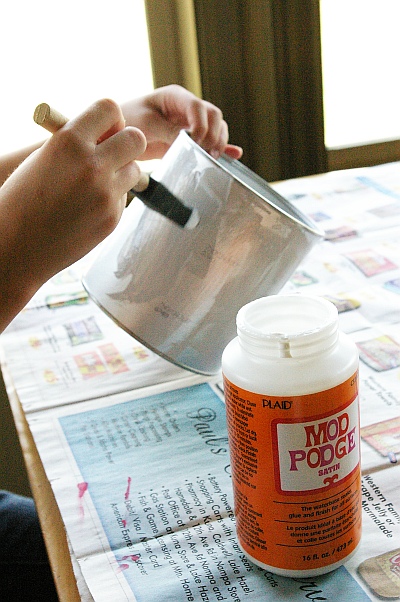
Step 3 - Give your can a good wet base coat of Mod Podge. Or if you going to be putting smaller pieces on only put a base coat on one small area at the time. Apply your paper while the Mod Podge is still wet.


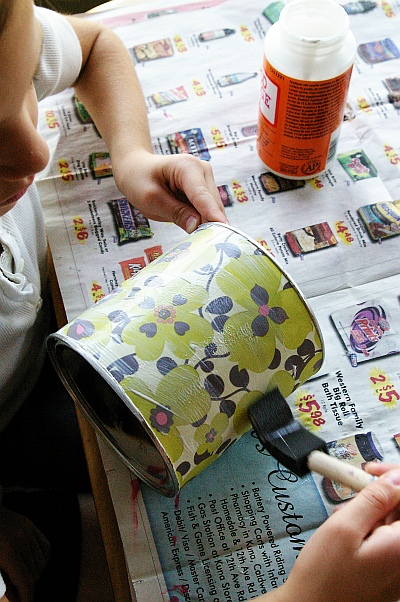
Step 4 - Generously apply Mod Podge over the paper, pressing out any air bubbles that creep up. Cover the entire surface is a good layer of Mod Podge.


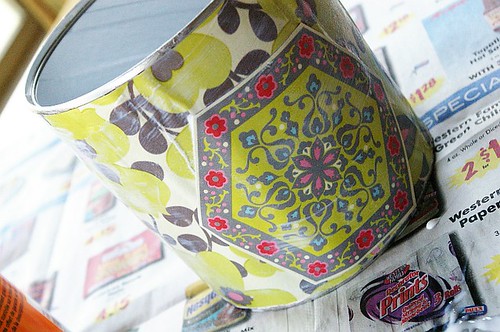
step 5 - Once you are done layering your paper pieces on, let your piece dry.


Step 6 - Once dry, fill it up with fun things! It's a great way to keep your kids "organized" and they get to have fun creating it! Fill it up with Pencils, markers or crayons. Use it for hair barrettes, rubber bands, comb and brush. Or corral all their small treasures in one handy container - you choose! Have fun!!! **If you try your hand at a fun project - share it our Brassy Apple Project flickr group!

Read More